How to place a shipment order
A walkthrough of the four-step order wizard, from choosing devices to paying at checkout.
Written By Andres Kõiva
Last updated 5 days ago
Placing an order in Raal is a four-step wizard. The stepper at the top of the page shows where you are: Choose Devices, Collection & Delivery, Order Overview, and Checkout.
Before you start
You need:
Your company billing details and a payment method on file, unless your payment policy defers payment.
The collection address, where Raal picks the device up.
The delivery address, where it is going.
Contact details for the people at both ends.
If billing is not configured, a banner replaces the order form and blocks the wizard until you set it up. See Setting up your billing details.
Step 1: Choose Devices
The page is headed Choose devices to transport and shows four tiles: Laptop, Monitor, Tablet, and Other. Use the − and + buttons on a tile to set how many of that type you are sending, then click Continue.
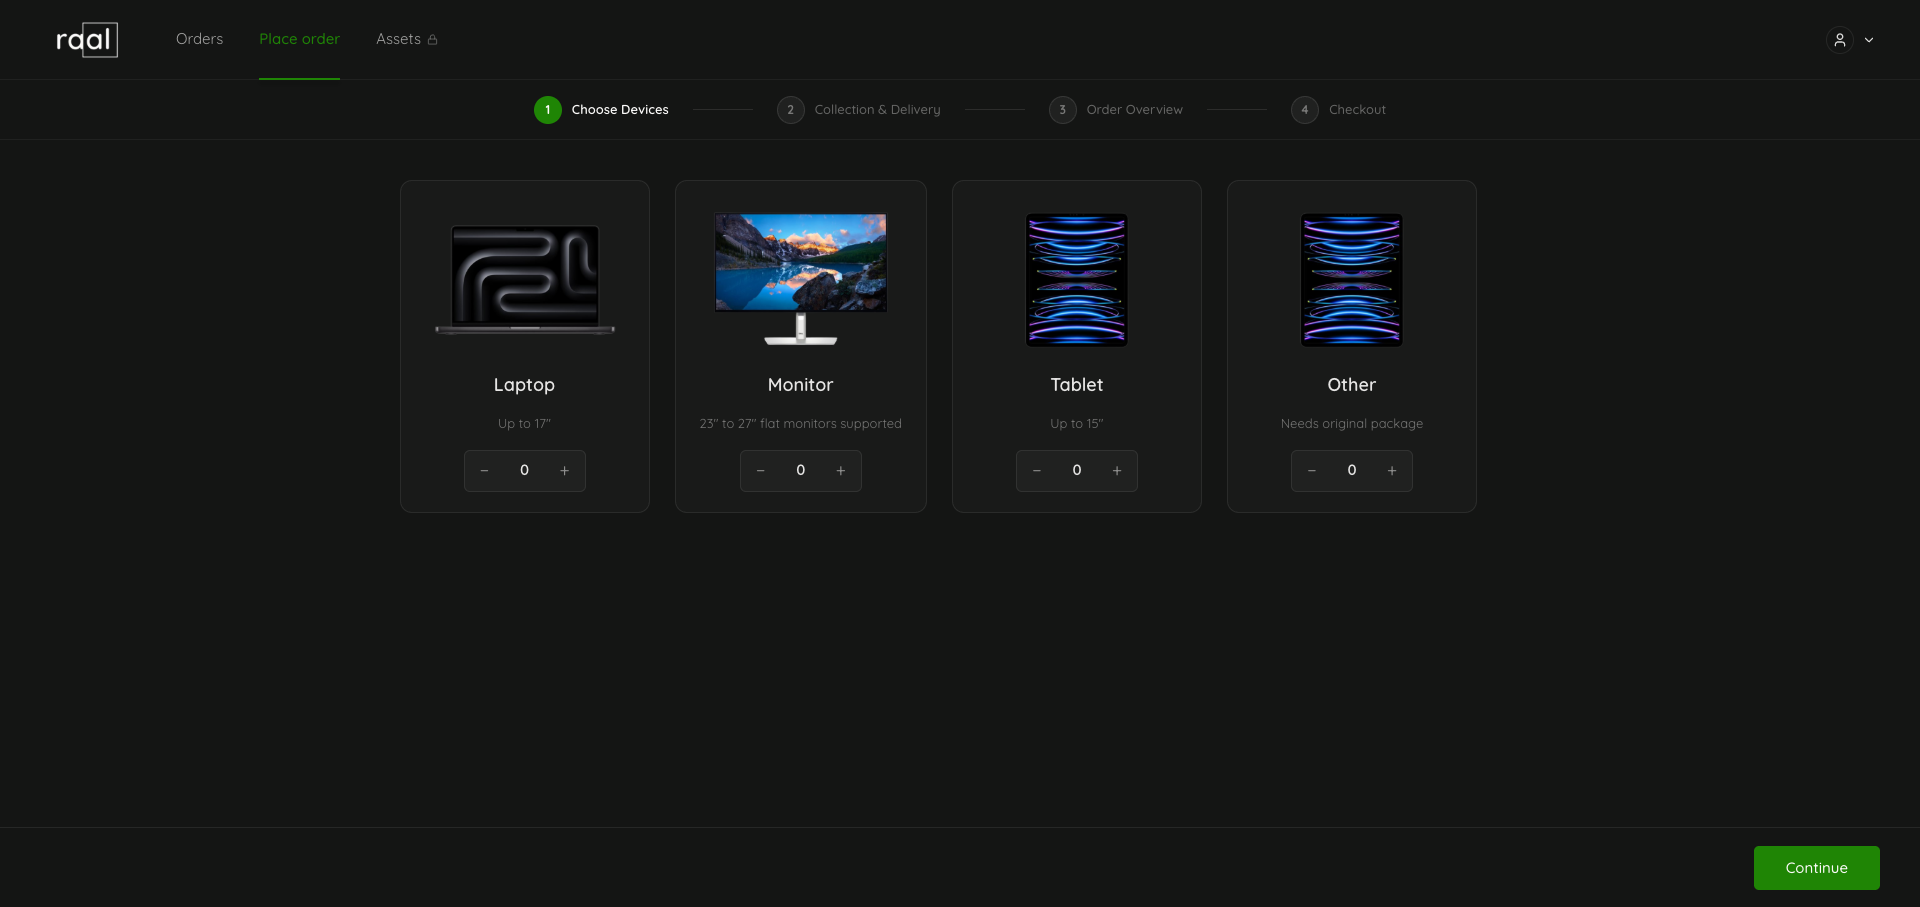
You have to pick at least one device. Continuing with none shows "Need to select at least one device for order."
For what each type covers and which sizes are supported, see Choosing devices: laptops, monitors, tablets, other.
Step 2: Collection & Delivery
Two cards sit side by side: Collection info, where the device is picked up, and Delivery info, where it is going. Both have the same fields.
Turn on Use saved address to fill a card from your company's saved details. It fills the contact name, email, and phone as well as the address.
Start typing in First Name to autocomplete from your BambooHR employees, if BambooHR is connected.
Start typing in Street address to use address autocomplete.
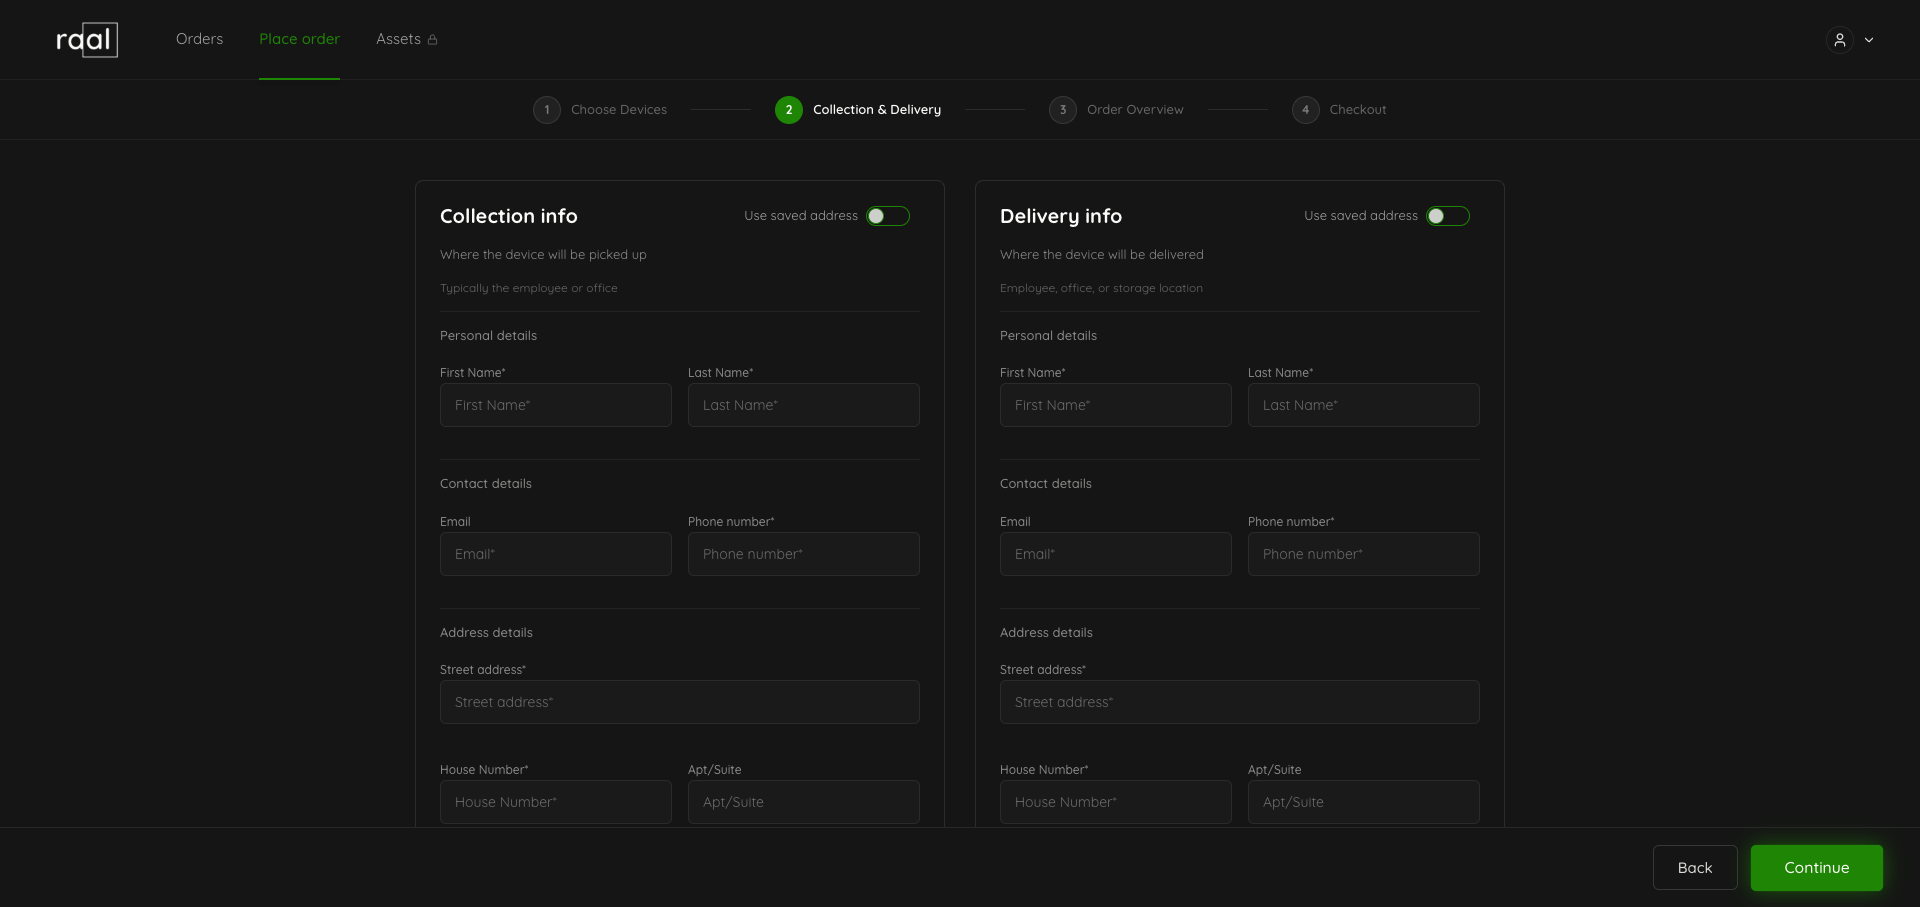
Everything is required except Apt/Suite. See Setting collection and delivery addresses.
Step 3: Order Overview
This is where the order is actually configured, so it is the longest step.
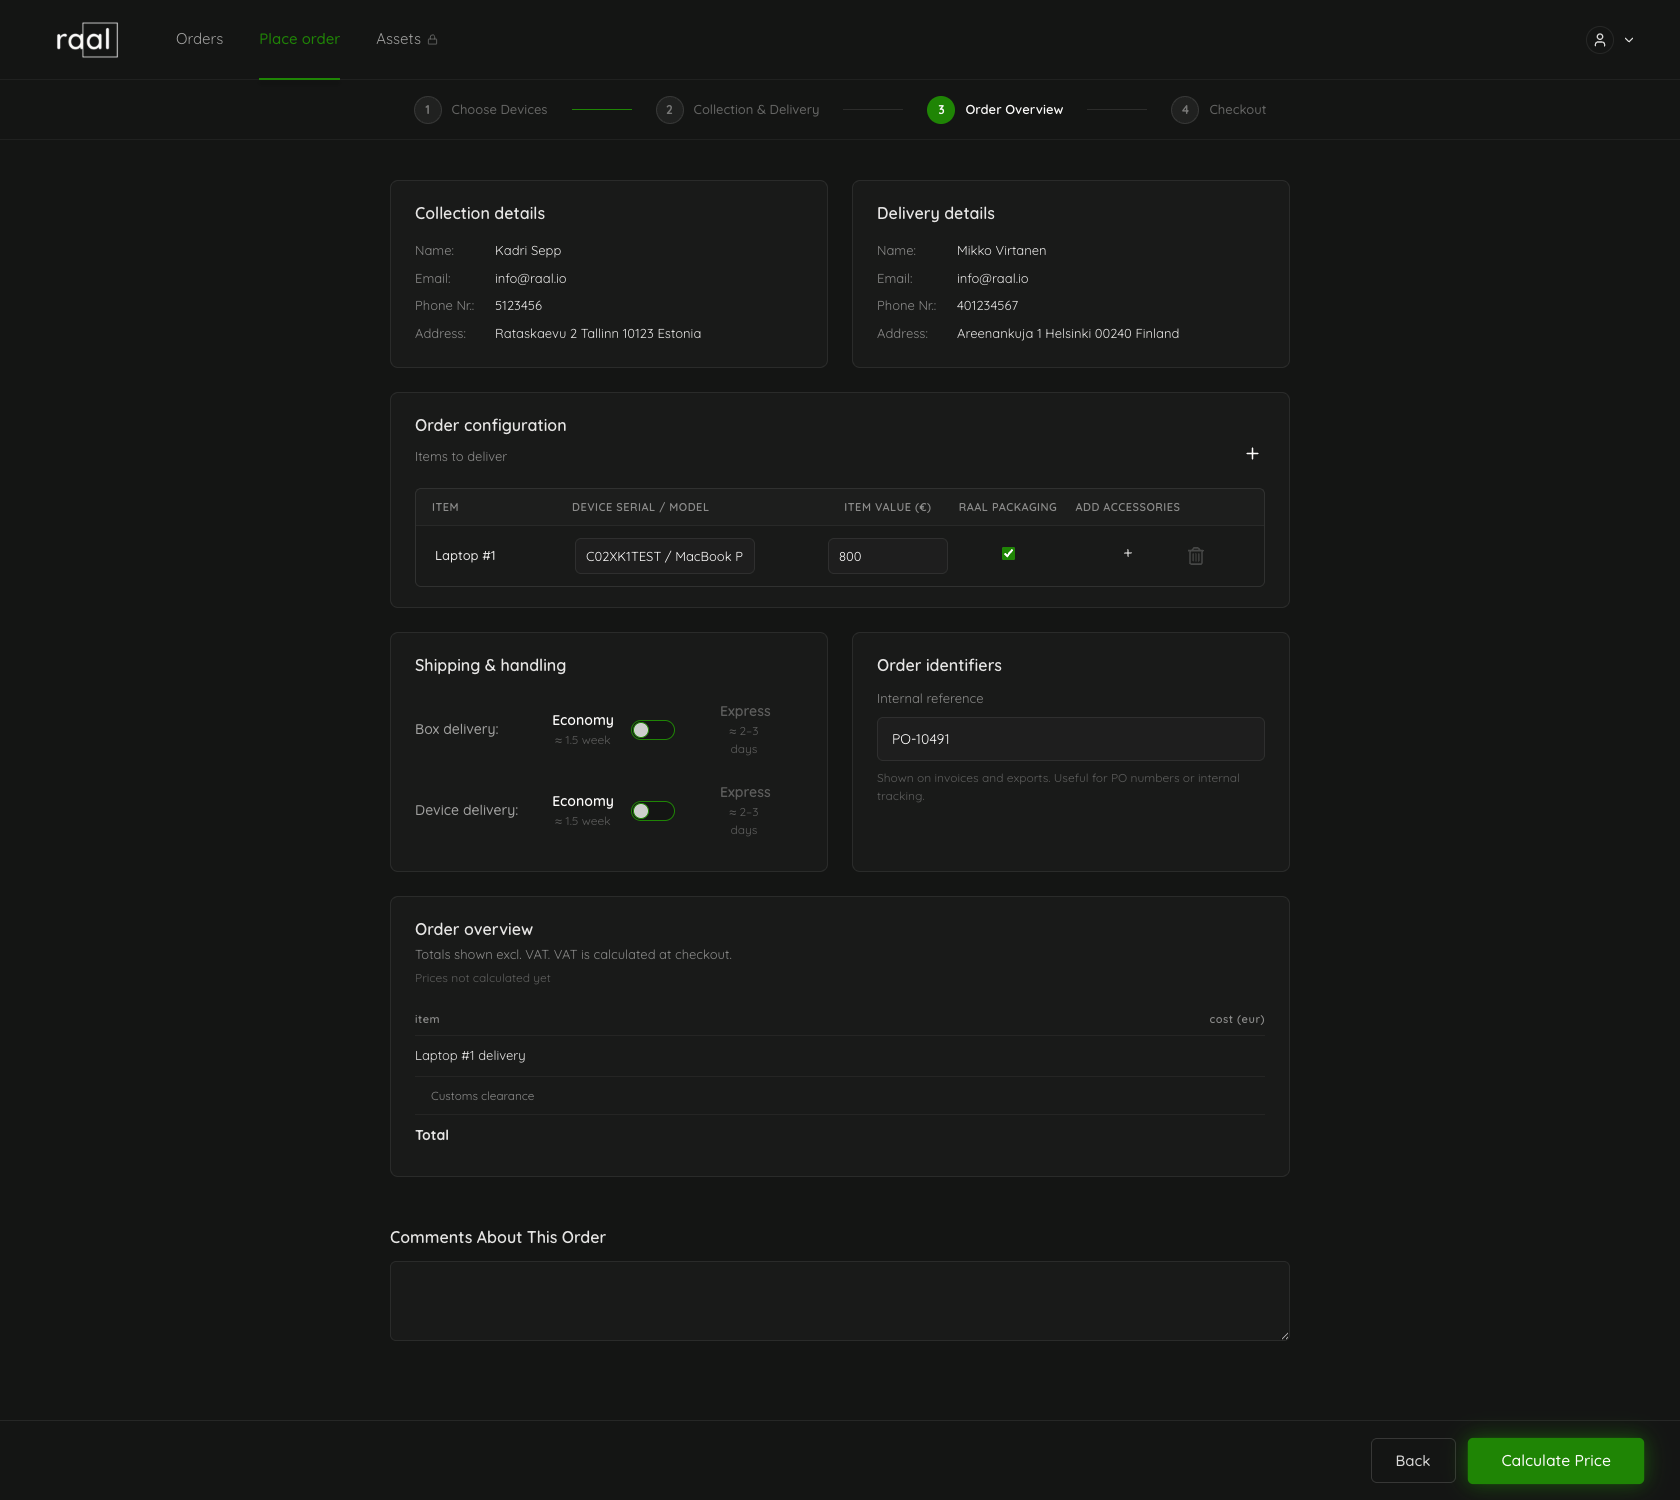
Collection details and Delivery details repeat back what you entered on Step 2, read only.
Order configuration holds the "Items to deliver" table, one row per device:
Item: the device type and its number, for example "Laptop #1".
Device Serial / Model: optional free text, for example "C02XXXX / Macbook Pro".
Item Value (€): required field. This is the declared value used for insurance and customs.
Raal Packaging: ticked by default, meaning Raal sends a transport box to the collection point. Untick it if the sender already has suitable packaging.
Add Accessories: a + button, on Laptop and Monitor rows only if Raal packaging is used.
Use the + at the top right of the section to add more devices without going back a step.
Shipping & handling shows the Economy and Express selectors where they apply. Order identifiers holds the optional Internal reference. Comments About This Order is a free-text box for the operations team to give instructions to Raal customer support.
Once item values are filled, an Order overview panel appears with a cost line per item and a total. Those totals exclude VAT; VAT is calculated at checkout.
Getting a price
Click Calculate Price to fetch live courier pricing. After a successful calculation, the button becomes Recalculate Price, and you need to click it again after any change that affects the price, including switching Economy or Express.
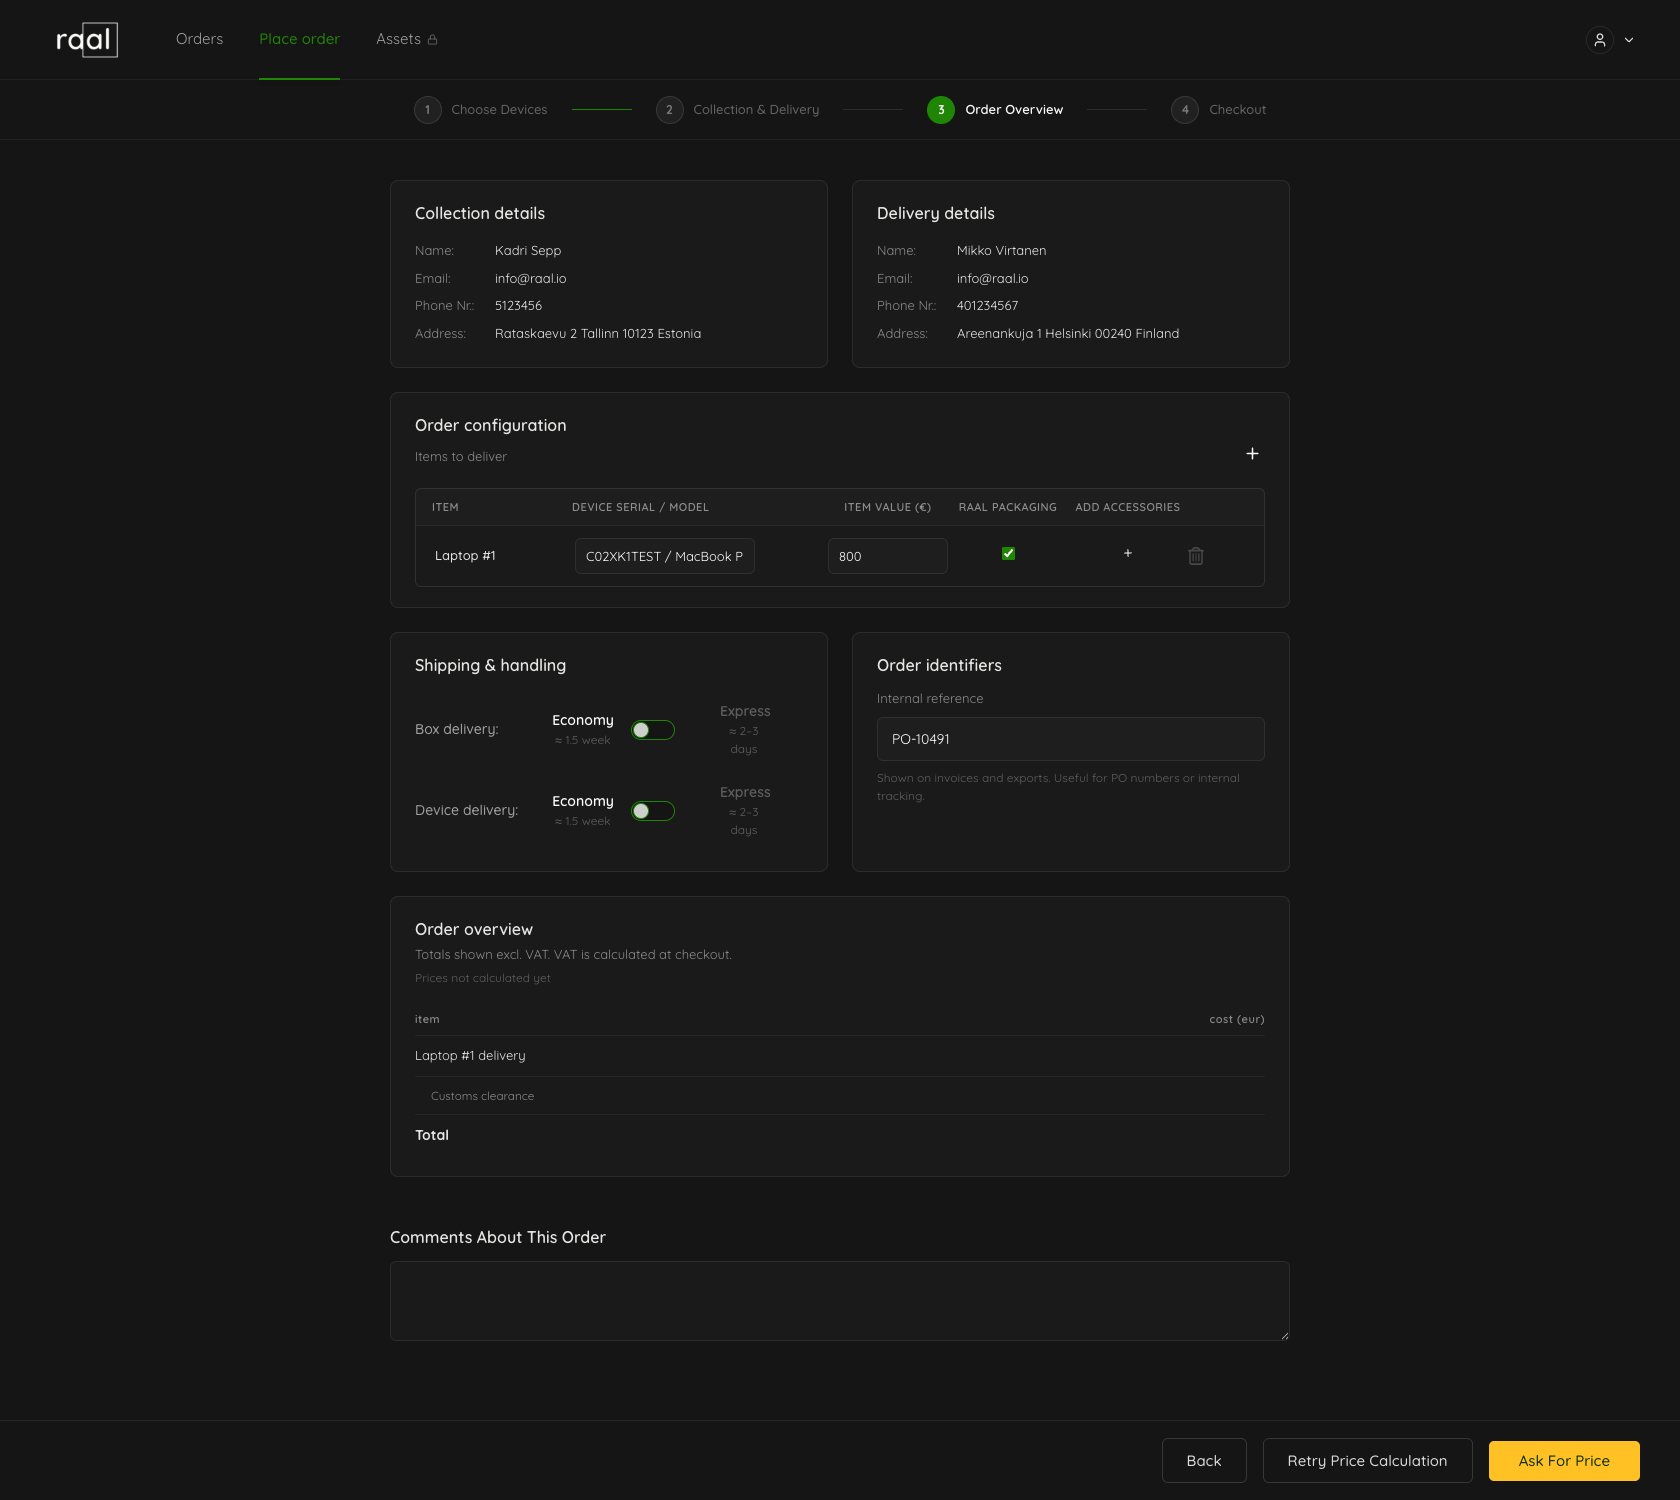
If the lane cannot be priced automatically, you get two buttons instead: Retry Price Calculation and Ask For Price. Ask For Price hands the order to the Raal team for a manual quote.
What the button in the corner is telling you
The button at the bottom right changes with the state of the order:
Calculate Price: no price yet. This is what you see when you first reach Step 3.
Calculating...: the request is in flight.
Recalculate Price: a price exists but something you changed has invalidated it, for example a different shipping speed or item value.
Retry Price Calculation and Ask For Price: the lane could not be priced automatically. Retry tries the lookup again; Ask For Price hands the order to the Raal team for a manual quote.
Proceed To Checkout: the price is ready and your company pays at order placement, so checkout is next.
Place order: the price is ready, but your company pays after fulfilment or on a monthly consolidated invoice, so there is no checkout. A confirmation dialog appears instead.
Processing: the order is being created. This one is brief.
Step 4: Checkout
Checkout lists the order items alongside an order summary with the subtotal and total due, and a receipt email field. Fill in the payment form and click Confirm and pay.
If your payment policy defers payment, you never reach the card form. A Confirm order placement dialog appears on Step 3 instead, telling you either that Raal will draft an invoice and finalize it after delivery, or that the order will be added to this month's consolidated invoice. Confirm there and the order is placed. See Payment policies: at order placement, after fulfilment, or monthly invoice.
Starting an order from an asset
You can also start an order from a device you already track in Assets. That prefills the order and puts you straight on Collection & Delivery, skipping device selection, because the device is already known. On that step Back returns you to the asset rather than to Step 1.
If you are on a subscription plan
On PAYG, an order that you cannot cover fails with an error message. On any other plan, if the order needs more OPS than you have, Raal offers you a top-up on the spot so you can finish placing it. See 'Insufficient OPS' when placing an order: what to do.